
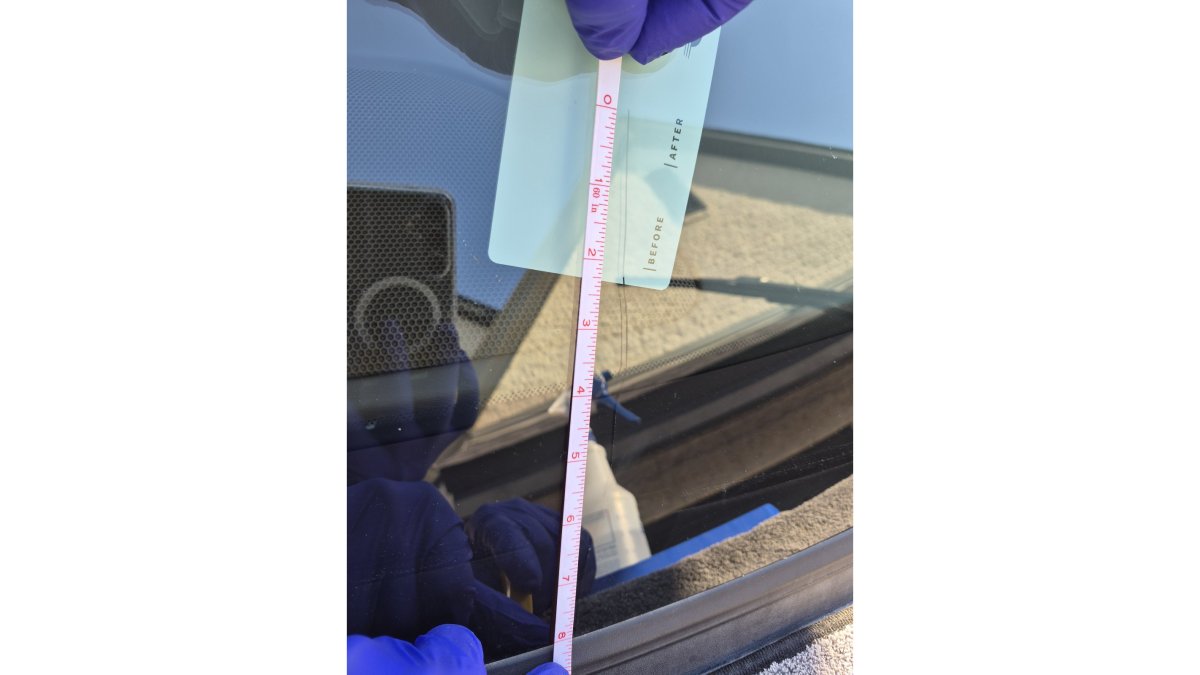
Last Updated: November 4, 2026
Quick Summary
To show windshield crack length in a photo, lay a rigid ruler or coin flat against the glass beside the crack, then shoot straight on with the whole crack and scale filling the frame. Add a second wide shot so the crack's position on the windshield is clear.
- Measure the crack end to end in inches before you photograph it.
- A rigid ruler lying flat on the glass is the most useful scale prop.
- Shoot at roughly 30 to 45 degrees so light catches the crack edges.
- Avoid digital zoom; walk closer instead to keep fine crack detail sharp.
- Save original files, since messaging apps compress images and lose detail.
Table of Contents
- Why a Photo of Windshield Crack Length Matters
- How to Measure Windshield Crack Before You Photograph It
- Step-by-Step: How to Show Windshield Crack Length in a Photo
- Camera Settings That Keep Glass Damage Sharp
- Building a Digital Documentation Workflow
- Windshield Crack Repair Cost and What Your Photo Reveals
- Text Your Damage Photo for a Quick Assessment
- Frequently Asked Questions
Why a Photo of Windshield Crack Length Matters
A good damage photo answers one question fast: how long is that crack? ClearPath Mobile Auto works from photos every day, and a clean shot with a scale in frame is often the difference between a quick quote and a string of back-and-forth texts. That is why learning how to show windshield crack length in a photo is worth ten minutes of your time. For examples of damage photos that produce an accurate quote, see these windshield damage photos that get an accurate repair quote.
Here is the part most guides skip. Length alone does not decide repairability. Location, edge involvement, contamination, and condition all matter, and a technician confirms the rest in person.
Still, length sets the starting point. Parking lot surveys across 13 cities in 12 states found that 14% of windshields have a long crack, and 79% of those long cracks are edge cracks (Ultra Bond parking lot survey data). Edge cracks change the conversation, which is why your photo needs to show where the damage sits, not just how big it looks.
What a Technician Looks For in a Damage Photo
We look at four things before anything else.
- The impact point. A bullseye chip or star break reads very differently from a stress fracture with no clear origin.
- The ends of the crack. Where it stops tells us more than where it starts.
- Distance to the edge. Edge involvement is a major factor.
- Scale. A coin or ruler in frame turns a guess into a measurement.
Industry guidance now leans hard on this last point. Photograph damage beside a ruler or coin so the technician has a sense of scale (GWP Glass Works damage documentation guidance). Without it, a close-up can make a two-inch crack look like a foot-long one.
How to Measure Windshield Crack Before You Photograph It
Measure first, shoot second. Lay a ruler or tape along the glass, follow the crack from end to end including any branches, and note the number in inches. Then photograph that same crack with the ruler still in place.
Cracks do not always run in a straight line. A crack that curves or forks needs its longest single run measured, not the sum of every branch. Write the number down before you pick up your phone.
Tools That Give Your Photo a Reliable Scale
Any rigid, familiar object works.
- A steel ruler or retractable tape measure
- A quarter, placed flat beside the crack
- A business card for very short damage
- A coin plus a ruler for the best of both
Skip soft measuring tapes. They bend, they blur, and they make the scale hard to read. A rigid ruler lying flat on the glass is the single most useful prop in your photo kit.
Step-by-Step: How to Show Windshield Crack Length in a Photo
Follow these five steps and you will have a photo a technician can actually work from.
- Clean the glass. Wipe the area with a dry microfiber cloth. Dust and fingerprints read as damage.
- Set your scale. Place the ruler or coin flat against the glass, parallel to the crack.
- Shoot straight on. Hold the phone square to the glass, not at an angle.
- Fill the frame. Get the entire crack plus the scale in one shot, with a little glass around it.
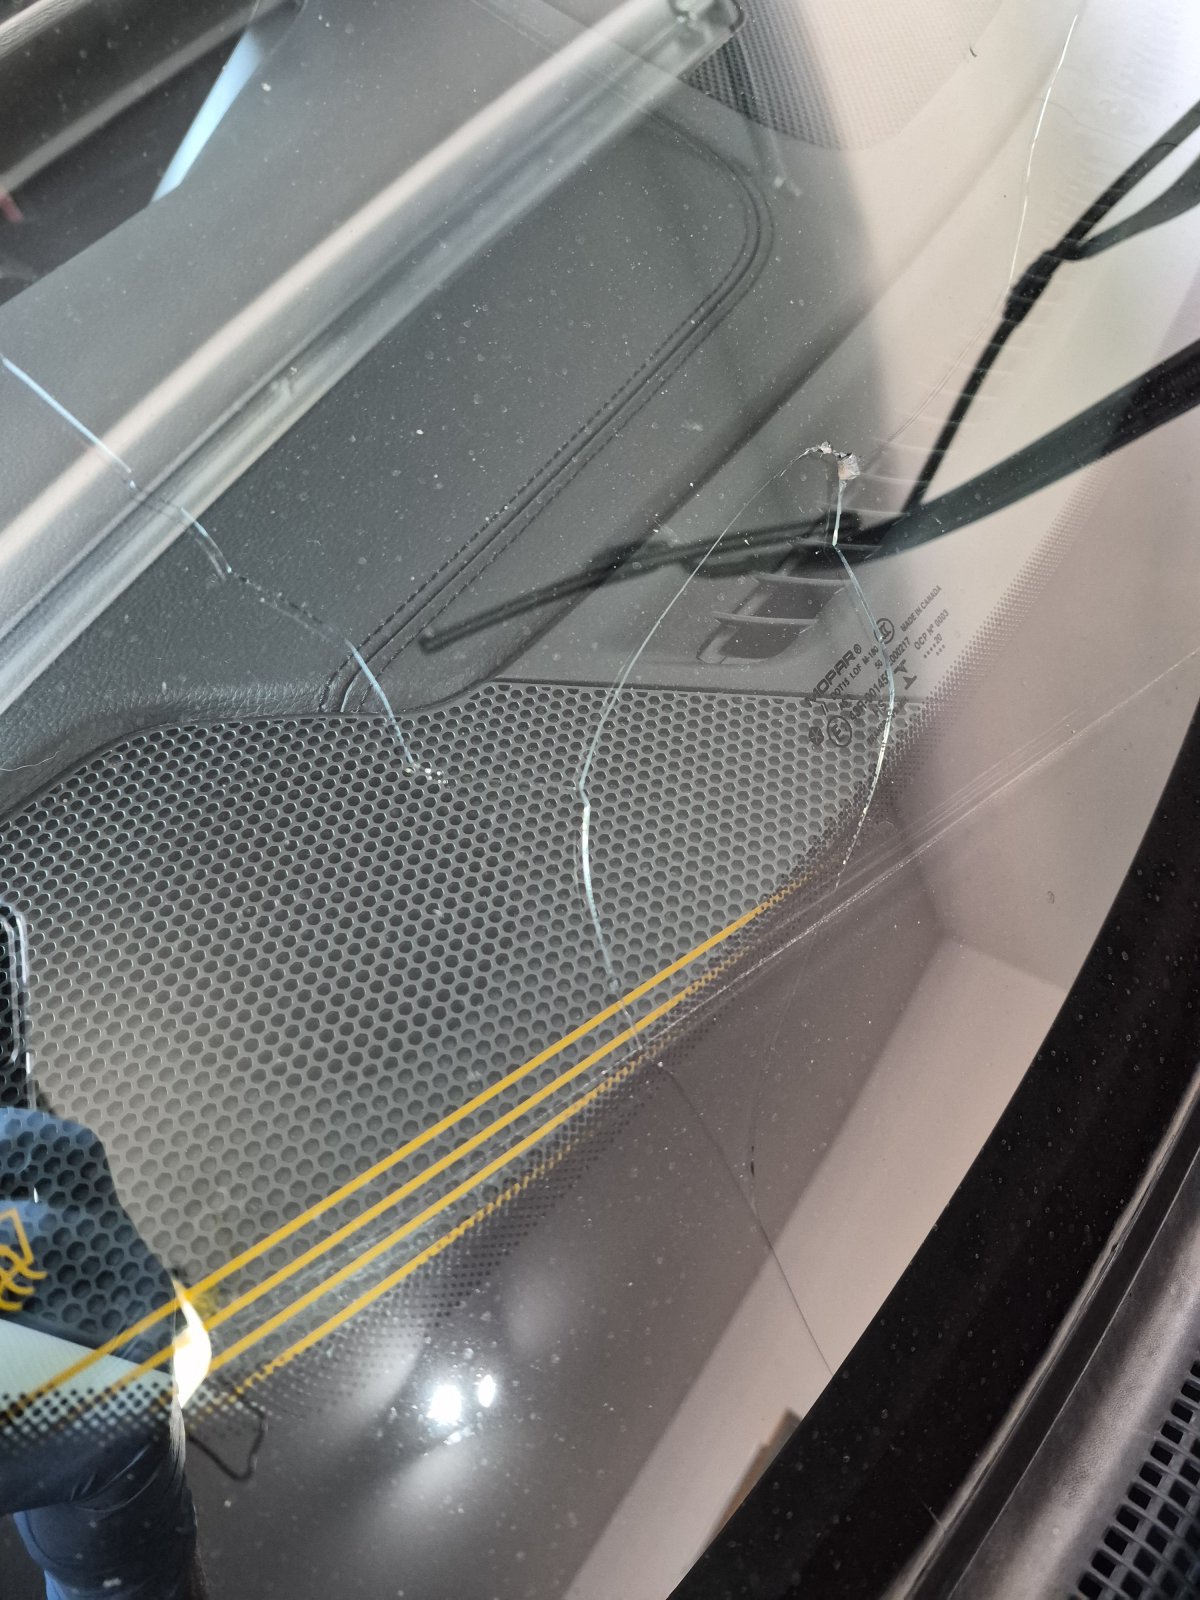
- Add a second wide shot. Step back and capture the whole windshield so the crack's position is obvious.
The man is American.
Two photos beat one every time. The tight shot proves length. The wide shot proves location.
Best Angles and Lighting for Glass Damage Photos
Shoot at a slight angle to the glass, roughly 30 to 45 degrees, so light catches the crack edges. Straight-on shots can wash the damage out. Then take one more shot square to the glass for the scale reading.
For lighting, use open shade or an overcast day. Direct sun creates glare that hides the crack. If you are stuck in bright sun, move the car so the windshield faces away from the light. Glare reduction matters more than a perfect background. For angle-specific tips, see our guide on how to photograph a windshield chip.
Camera Settings That Keep Glass Damage Sharp
Most phones do fine here, but a few settings help. Tap and hold on the crack to lock focus and exposure, then drag the exposure slider down slightly. Glass is bright, and a slightly darker exposure keeps the crack edges visible.
Avoid digital zoom. Walk closer instead. Digital zoom softens detail, and a soft photo of a fine crack is useless. If your phone has a macro mode, use it for the tight shot and skip it for the wide one.
Building a Digital Documentation Workflow
Treat damage photos like any other record. Shoot, label, and store them in one place so nothing gets lost.
- Create a folder per vehicle or per incident. Name it with the plate or VIN and the date, for example "plate-ABC1234-2026-11-04." One folder per event keeps the tight, angled, and wide shots together.
- Name files with the date and the measured length. A name like "2026-11-04-crack-7in-tight.jpg" tells you what the photo shows without opening it.
- Keep the original files, not just the ones you texted. Messaging apps compress images, and the compressed copy can lose the fine detail that proves the crack length. Save the originals to cloud storage or a computer.
- Note the location on the glass. Driver side or passenger side, low or high, and how close the damage sits to the edge. Put that in the file name or a short text note beside the photos.
- Timestamp the set. Most phones embed the date and time in the file; check that your camera app has location and date stamps turned on, and keep them on for damage photos.
- Keep a short written log. One line per incident with the date, the measured length, and the location on the glass is enough, and it pairs with the photos when you need to show a record.
This workflow pays off for car rental inspections and pre-existing damage records. A dated photo with a scale, a measured length, and a note on location is hard to argue with. For examples of what good documentation looks like, browse our windshield crack repair before and after photos.
When you are ready for an assessment, text the tight shot with the scale and the wide shot to (469) 919-2383. We serve Anna, McKinney, Melissa, and nearby communities in the North Collin County area. Hours are Monday through Friday, 7 AM to 7 PM, and Saturday, 9 AM to 4 PM, with same-day appointments when available.
Windshield Crack Repair Cost and What Your Photo Reveals
Your photo does two jobs. It gets you a faster quote, and it tells you which price tier you are likely in before anyone touches the glass.
Crack repair runs $89 for damage up to 6 inches, $120 for cracks over 6 up to 10 inches, and $135 for cracks over 10 up to 14 inches. Chip repair is $89, with each additional chip at $30.
Here is how the measurement maps to the quote:
| What Your Photo Shows | Typical Service | Price |
|---|---|---|
| One chip, no legs | Chip repair | $89 |
| Two chips close together | Chip repair, two chips | $119 |
| Crack up to 6 inches | Crack repair | $89 |
| Crack over 6 up to 10 inches | Crack repair | $120 |
| Crack over 10 up to 14 inches | Crack repair | $135 |
Under ROLAGS standards, many cracks up to 14 inches can be repaired. Cracks over 14 inches are not something we repair. The old six-inch rule is not a physical limit; repairability comes down to location, edge involvement, contamination, and condition (Chip Pro Utah on the six-inch repairability myth). Research using 3D digital image correlation has tracked how cracks start and spread in laminated glass, which is why condition matters as much as length (ScienceDirect study on windshield crack propagation).
For a closer look at how length maps to tiers, see our mobile windshield crack repair page.
Text Your Damage Photo for a Quick Assessment
Texting a photo is the fastest way to get a real answer. Send the tight shot with the scale and the wide shot, and we can usually give you a first assessment and a quote from those two images.
A few things to include in your text:
- The measured length in inches
- Where the damage sits on the windshield
- Whether the crack reaches the edge
- Your location in the North Collin County area
We serve Anna, McKinney, Melissa, and nearby communities. Hours are Monday through Friday, 7 AM to 7 PM, and Saturday, 9 AM to 4 PM. Same-day appointments when available.
Most chip repairs take about 30 minutes. Repair is designed to stabilize qualifying damage, and a small mark may remain after repair. Workmanship is covered while the original owner owns the vehicle, with a free re-repair if the damage spreads; details are on our warranty page.
Frequently Asked Questions
What is the best way to photograph a windshield crack?
Clean the glass first, then place a ruler or coin beside the damage so the photo has a known scale. Shoot straight on and at a slight angle, use soft daylight rather than direct sun, and tap the screen to focus on the crack. Include one wide shot showing where the damage sits on the windshield and one close-up showing the full windshield crack length. Send both photos together so a technician can judge location and size.
How do I show the scale of a windshield crack in a photo?
Put a reference object directly beside the crack, in the same plane and the same frame. A ruler or tape measure works best because it gives an exact reading; a coin works if you have nothing else. Keep the reference object touching the glass and parallel to the crack. Avoid holding it at an angle, which distorts the apparent length. One clear scale photo is worth more than several shots without a reference.
Does a photo help a technician determine if a crack is repairable?
Yes, a good photo gives a technician a strong first read on location, edge involvement, and overall condition. Under ROLAGS standards, many cracks up to 14 inches can be repaired, but repairability depends on factors a photo cannot fully show, such as contamination inside the break. ClearPath Mobile Auto uses your photo for a quick first assessment and quote, then confirms repairability in person before any work begins.
What details should I include when sending a photo of windshield damage?
Send a wide shot and a close-up with a scale reference, plus a sentence on where the damage sits and when you first noticed it. Note whether the crack reaches the edge of the glass. For pricing context, ClearPath Mobile Auto charges $89 for crack repair up to 6 inches, $120 for over 6 up to 10 inches, and $135 for over 10 up to 14 inches. Text your photos to (469) 919-2383 for a quick first assessment.
A blurry photo with no scale wastes everyone's time. A sharp shot with a ruler in frame gets you a straight answer, often in minutes. ClearPath Mobile Auto brings one certified technician to your driveway, with upfront pricing and no shop visit. Text a photo of the damage to (469) 919-2383 for a quick first assessment and quote, or visit our quote page to get started and find out exactly where your crack stands.
