
Last Updated: November 4, 2026
Quick Summary
The best angle to photograph a windshield chip is about 45 degrees off the glass, with light hitting the damage from the side. Square-on shots let glare hide the chip, so angle the phone and keep the lens level with the damage.
- Hold the phone 6 to 10 inches from the glass for close-up shots.
- Take shots in order: wide, mid-range, close-up, then alternate angle.
- Rest a coin, key, or fingertip beside the chip for scale and focus.
- In direct sun, cast a shadow over the glass and shoot inside it.
- Shift a foot to one side if reflections appear, then reshoot.
Table of Contents
- Why the Best Angle to Photograph a Windshield Chip Matters
- Set Up Your Phone Camera Before You Shoot
- The 45-Degree Angle: How to Photograph a Windshield Chip Without Glare
- Build a Repeatable Shot List: Close-Up, Mid-Range, and Wide Shot
- Lighting for Chips, Star Breaks, and Bullseyes in Any Weather
- How Photos Connect to Windshield Chip Repair Cost
- What Your Photos Reveal About Windshield Crack Repair Size Limits
- Text Your Photos to ClearPath Mobile Auto
- Frequently Asked Questions
Why the Best Angle to Photograph a Windshield Chip Matters
That single angle decides whether a photo is useful or useless.
A sharp, well-angled shot makes it much easier to judge the chip type, its size, and its position.
Here's what most guides get wrong: they treat this as a photography problem. It's a lighting problem first.
Below, we'll show you exactly how to set up, frame, and shoot a chip so the photo answers every question a technician needs.
Set Up Your Phone Camera Before You Shoot
Before you take a single photo, spend thirty seconds on setup. It saves ten minutes of back-and-forth later.
Clean the Glass and Pick Your Spot
Wipe the area around the chip with a clean microfiber cloth.
Then move the car if you can. Park so the windshield faces away from direct sun. Open shade, a garage, or an overcast sky gives you the most even light.
If you can't move, drape a jacket or towel over the glass above the chip to block overhead sun. Simple, and it works.
Lock Focus and Exposure
Your phone's autofocus can hunt on clear glass. Fix that before you shoot:
- Tap and hold on the chip until the focus locks
- Drag the exposure slider down if the glass looks washed out
- Turn off flash, always
A common mistake is holding the phone one-handed at arm's length. In practice, that guarantees motion blur on a subject this small.
The 45-Degree Angle: How to Photograph a Windshield Chip Without Glare
When you photograph a windshield chip, the camera should sit about 45 degrees off the glass surface, not square to it.
Square-on shots fail because the reflection of whatever is behind you lands right on top of the damage.
Two more adjustments matter:
- Distance: hold the phone 6 to 10 inches from the glass for close-ups
- Height: keep the lens level with the chip, not above or below it
Watch out: if you see a bright reflection of the sky or your own hand in the frame, shift your body a foot to one side and reshoot.
Build a Repeatable Shot List: Close-Up, Mid-Range, and Wide Shot
A single photo rarely answers every question. A repair technician benefits from seeing the damage itself, where it sits on the glass, and how the whole windshield looks.
Take them in that order. Start wide and work in, because the wide shot establishes context that makes every later photo easier to interpret.
Shot 1: The Wide Shot (Whole Windshield)
Stand outside the vehicle, roughly three to four feet back from the glass, and frame the entire windshield. Hold the phone at chest height and keep it square to the glass for this shot only. The goal is context, not detail: the viewer should see the wiper path, the dashboard line through the glass, and roughly where the damage sits.
If the chip is small, it may not be visible in this shot at all. That is fine. The wide shot is a map, not a portrait.
Shot 2: The Mid-Range Shot (Location)
Move to about two feet from the glass and frame an area roughly the size of a dinner plate around the chip. Include one fixed landmark in the frame, such as the base of the wiper arm, the edge of the dashboard, or the rearview mirror mount. That landmark is what lets a technician place the chip precisely.
Location matters as much as size. A chip near the edge of the glass behaves differently from one in the middle of the driver's line of sight, and the mid-range shot is where that difference shows.
Shot 3: The Close-Up With a Scale Reference
The close-up shows the damage itself. Hold the phone 6 to 10 inches from the glass, angle it about 45 degrees off the surface, and rest a coin, a key, or your fingertip beside the chip, within the frame but not covering it.
Take two close-ups from slightly different angles. One will usually come out sharper, and the pair lets a technician compare how the break catches light from two directions.
Shot 4: The Alternate Angle
Return to the 45-degree position but shift to the opposite side of the chip and shoot again. A break that looks like a faint smudge from one side often shows its legs or its pit clearly from the other. This is the shot that most often rescues a set where the first close-up came out flat.
The Full Checklist Before You Send
Run through this list once, then send the whole set in one message:
- Wide shot of the full windshield from outside
- Mid-range shot with a fixed landmark in frame
- Close-up with a coin, key, or fingertip for scale
A consistent set of five or six photos taken this way gives a technician more to work with than a pile of random shots. For examples of close-ups that actually work, see our guide to windshield damage photos that get an accurate repair quote.
Take the shots in this order every time so a technician gets context, location, and detail in one set.
| Shot | Distance from glass | What it shows |
|---|---|---|
| Wide shot | Three to four feet back | Whole windshield, wiper path, dashboard line |
| Mid-range shot | About two feet | Dinner-plate area with a fixed landmark |
| Close-up | 6 to 10 inches, about 45 degrees | Damage itself with a coin, key, or fingertip for scale |
| Alternate angle | 45-degree position, opposite side | Legs or pit that a flat first close-up misses |
| Inside shot | From inside the car | Chip, if it is easy to reach |
Lighting for Chips, Star Breaks, and Bullseyes in Any Weather
Light is what makes a chip visible. The glass itself is clear, and the break only shows up when light bends through its edges at an angle your phone can capture. That is why the same chip can look obvious at 4 PM and vanish at noon. The fix is to control the light rather than wait for perfect conditions.
Overcast and Shade: The Easy Conditions
Overcast days are the most forgiving. Cloud cover turns the whole sky into one large soft light, and chips show up cleanly with no hotspots. Open shade under a tree or beside a building works almost as well. If you have a choice, shoot on a cloudy day or move the car into shade.
Direct Sun: Create Your Own Shade
Direct sun is the hardest condition because the reflection of the sky lands right on top of the damage. First, park so the windshield faces away from the sun. Second, use your body to cast a shadow across the glass and shoot inside that shadow.
A small flashlight held low and to the side also works in sun. Sweep it slowly across the chip until the edges light up, then shoot while the light is in the right spot.
Night and Indoor Lighting
At night or in a garage, you supply the light. Hold a phone flashlight or a small torch low and to one side of the chip, at roughly the same 45-degree angle you use for the camera. Keep the light source out of the frame so it does not blow out the exposure.
Rain, Cold, and Fog
Water fills a chip and hides the break, so dry the spot with a microfiber cloth and shoot fast before moisture creeps back in. In cold weather, run the defroster briefly to clear fog from the inside, then let the glass settle before shooting so you are not photographing a haze. Avoid pressing hard on cold glass while you clean it.
How Each Damage Type Reads on Camera
Different shapes need slightly different treatment, and knowing which one you have helps you frame it:
- Bullseye: a clean circle with a dark center, easiest to capture at 45 degrees with side light. Shoot it slightly off-axis so the ring catches light on one side.
- Star break: legs radiating outward from a center point. Side light is essential here, because the legs disappear under flat front light. Sweep your light source until the legs show, then shoot.
- Combination break: a bullseye with legs. Treat it like a star break and use side light to reveal both the ring and the legs.
Troubleshooting Reflections and Focus Hunting
Two problems account for most failed chip photos. Reflections are the first: if you see the sky, a building, or your own hand in the frame, shift your body a foot to one side and reshoot so the chip sits in a darker patch of glass. Focus hunting is the second: autofocus struggles on clear glass because it has nothing to grab.
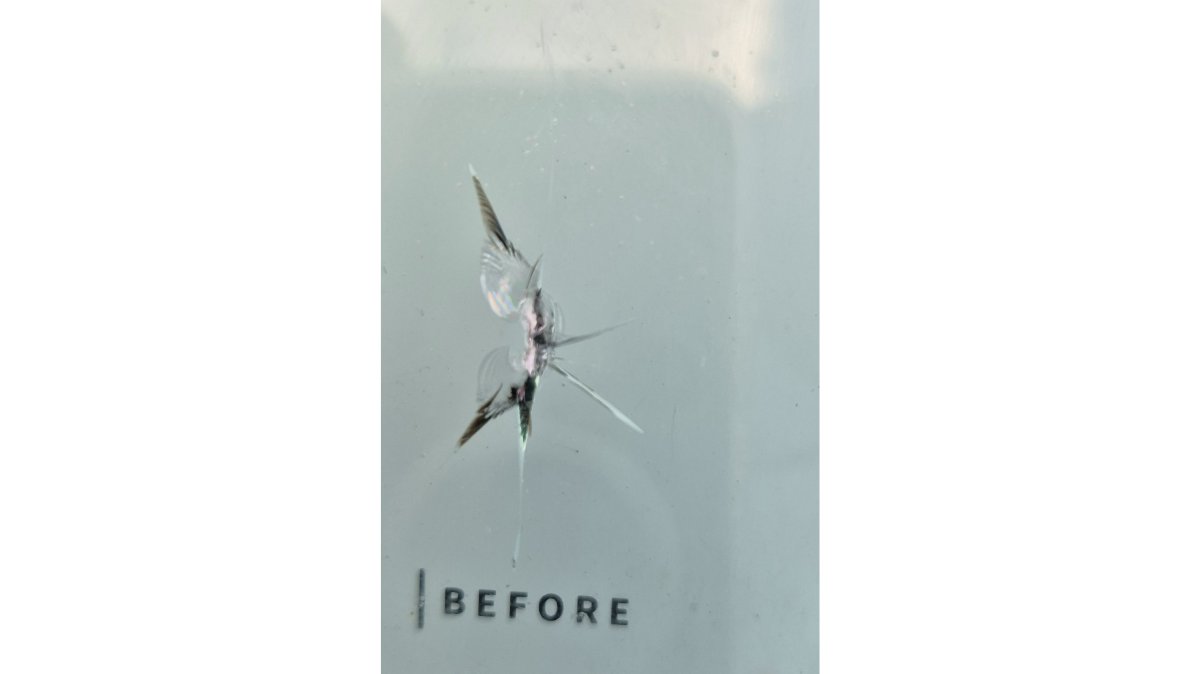
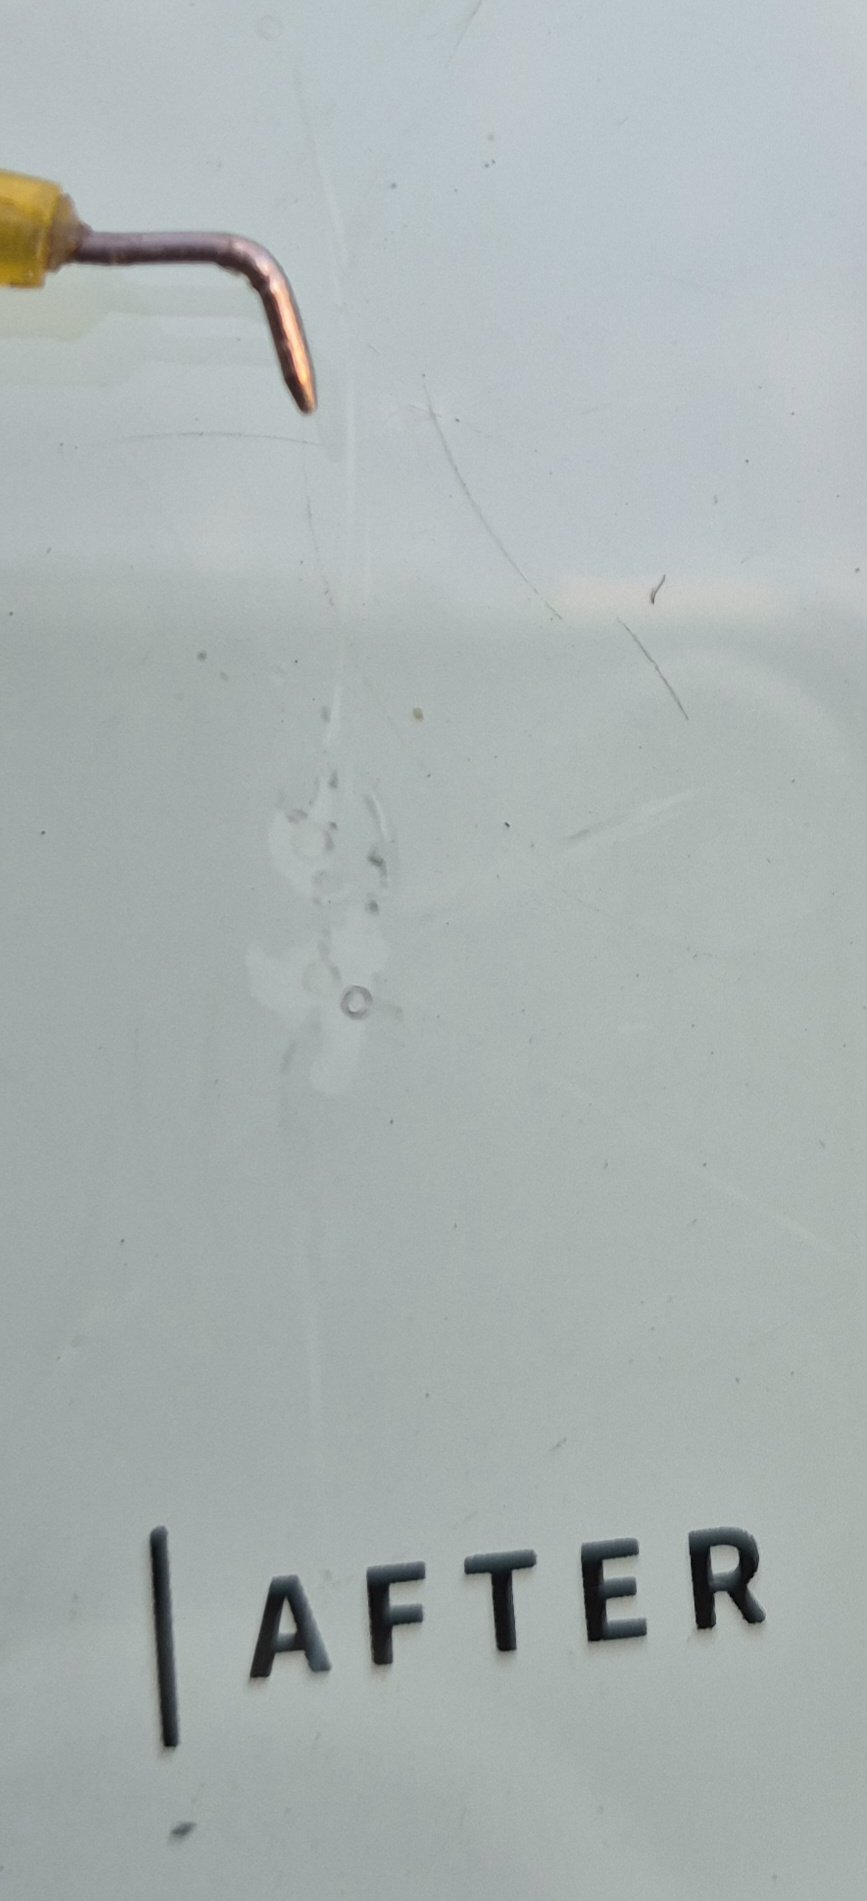
For a look at how these repairs finish up, our windshield crack repair before and after photos show real examples from our own work.
How Photos Connect to Windshield Chip Repair Cost
Windshield chip repair cost depends on how many chips you have.
Our chip repair pricing is $89 for the first chip, with each additional chip at $30.
A blurry photo can mean a second round of texts before a price can be confirmed.
You can see the full service and pricing on our mobile windshield chip repair page.
What Your Photos Reveal About Windshield Crack Repair Size Limits
Windshield crack repair size limits are wider than most drivers expect.
Size alone doesn't decide it. Location, edge involvement, contamination, and the condition of the glass all matter, and repairability is confirmed in person.
A photo taken along the length of the crack, with a coin or key at one end for scale, tells us which band you're in before we arrive. Our mobile windshield crack repair page lays out the same ranges.
Repair is designed to stabilize qualifying damage. A small mark may remain afterward, and we'll say so up front.
Text Your Photos to ClearPath Mobile Auto
You've got the angle, the lighting, and the shot list. Now send them.
ClearPath Mobile Auto serves Anna and the surrounding North Collin County area, with same-day appointments when available.
If a photo shows damage beyond repair, we'll tell you and refer you to a trusted glass shop.
Ready to get a number? Visit our quote page to send your photos and get started.
Frequently Asked Questions
What is the best angle to photograph a windshield chip?
Shoot from about 45 degrees off the glass, not straight on. A 45-degree angle lets side light catch the edges of the chip so it shows up as a defined shape instead of a glare spot. Pair that angle with a close-up, a mid-range shot, and a wide shot so the technician can see both the damage and where it sits on the windshield.
How do I photograph a windshield chip without glare?
Turn off the flash and move so the light hits the glass from the side. Overcast daylight or open shade works well because it spreads light evenly. If the sun is direct, stand so your shadow falls across the chip, or have someone hold a jacket or piece of cardboard to block the sun. Shooting at 45 degrees also keeps reflections from pointing back into the lens.
Should I put a coin next to the chip for scale?
Yes. A coin, key, or fingertip beside the chip gives the technician a size reference and something for autofocus to lock onto. Place it just outside the damage, not on top of it, and keep it in the same plane as the glass. Take one shot with the reference object and one without so the chip itself stays unobstructed.
How many photos should I send for a windshield chip repair cost estimate?
Send at least four: a close-up with a scale reference, a close-up without it, a mid-range shot showing the surrounding glass, and a wide shot from outside the vehicle showing where the chip sits. Add a photo from a second angle if the chip is a star break or bullseye. More angles help the technician confirm repairability before quoting.
A blurry photo delays your repair. A sharp one gets you a firm quote the same day. Text your shots to ClearPath Mobile Auto at (469) 919-2383, and we'll assess the damage, confirm repairability, and give you an upfront price before we ever pull into your driveway.
